Budget Friendly IKEA Built-In Closet Hack
*contains affiliate links
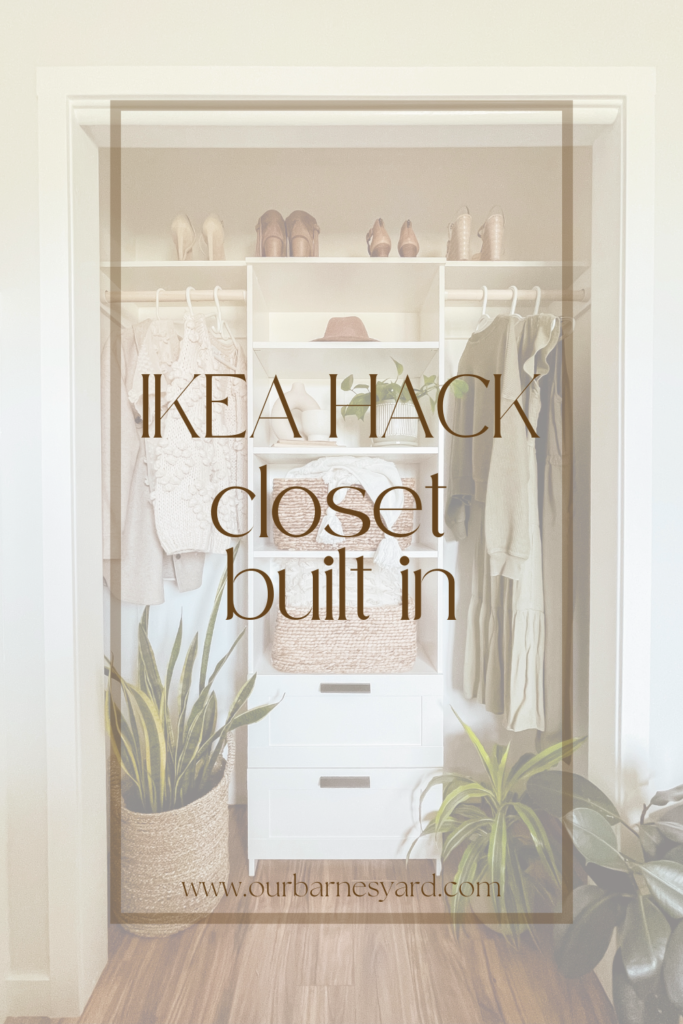
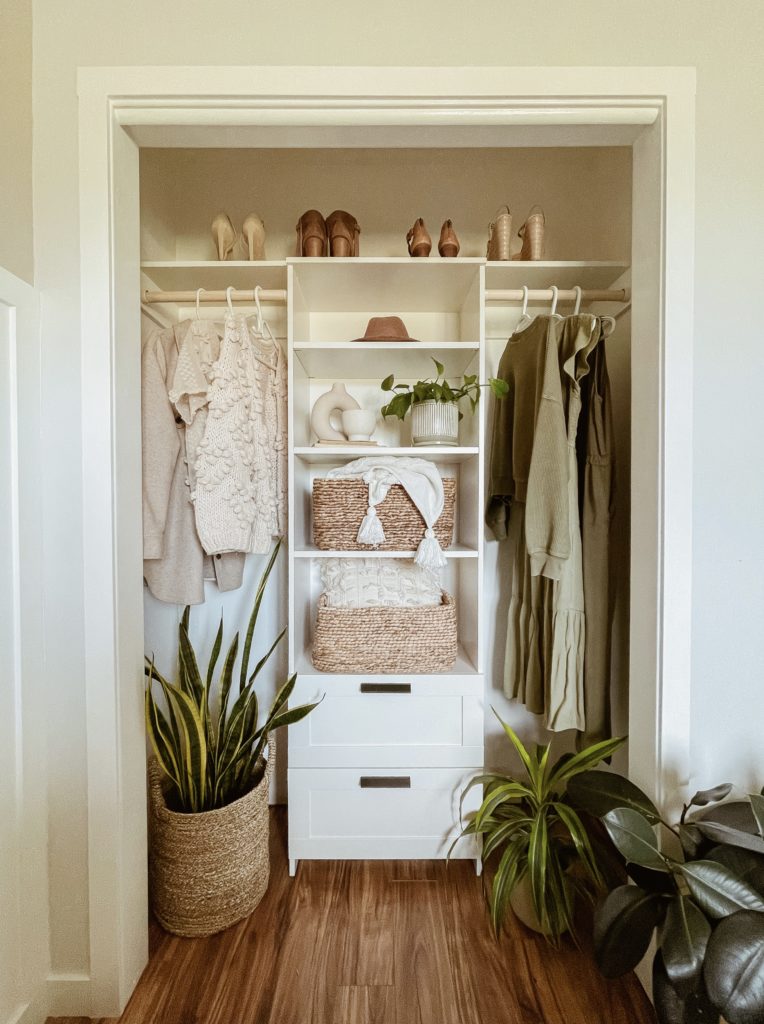
A few years ago, I decided to revamp the closets in our home (hello 2000’s builder grade) and settled on the IKEA Brimnes shelf as the base. The IKEA Brimnes shelf is fully customizable whether you need drawers or shelves, which made it the perfect fit for our closet renovation.
I was able to keep this project easy on the budget by re-using the original closet shelf and shelf supports.
If you’re interested in tackling this project on a weekend, make sure to bookmark this post as I walk you through this project step-by-step from beginning to end.
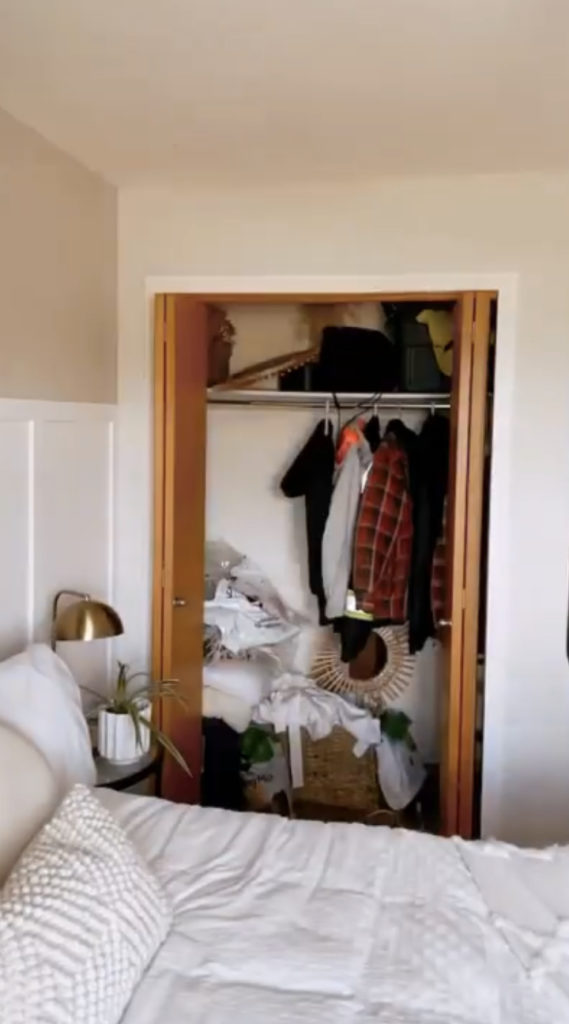
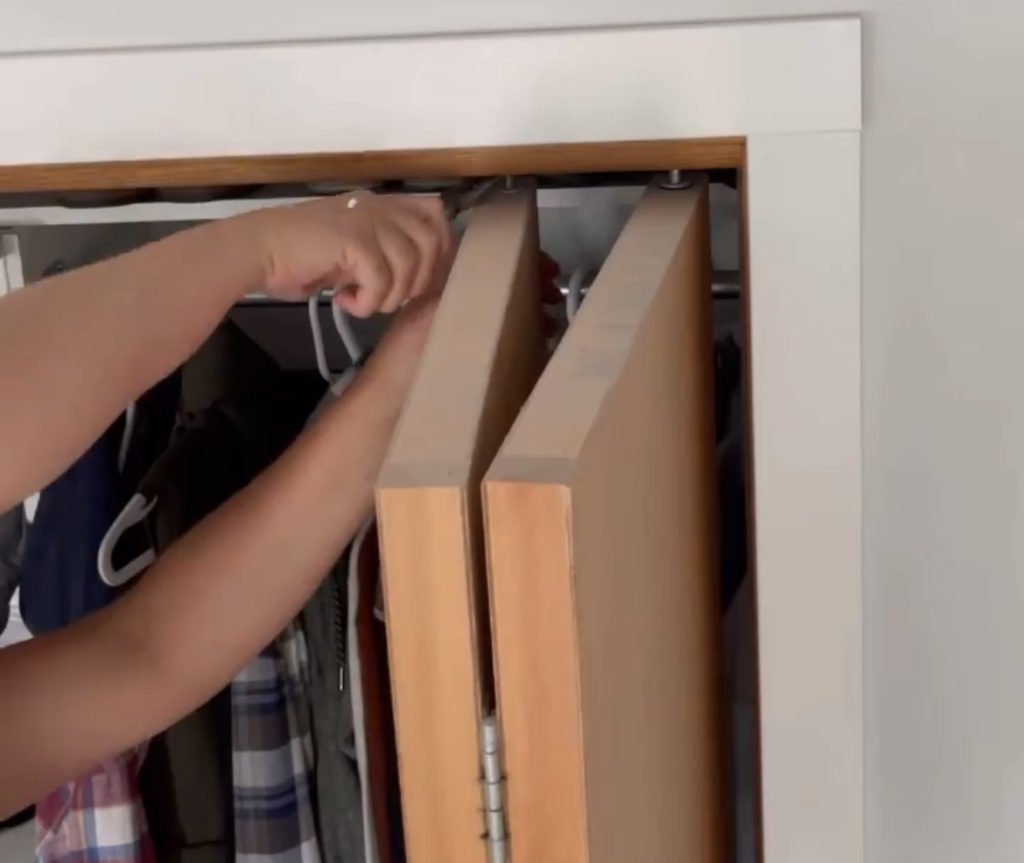
Step 1: I started by taking the closet doors off to allow for easier access to the space. If you are unsure of how to do this, grab a pair of small pliers and firmly pull down the vertical metal piece attached to the spring. This will work for most closet doors, however depending on the age of your home and door type, you may require a different approach.
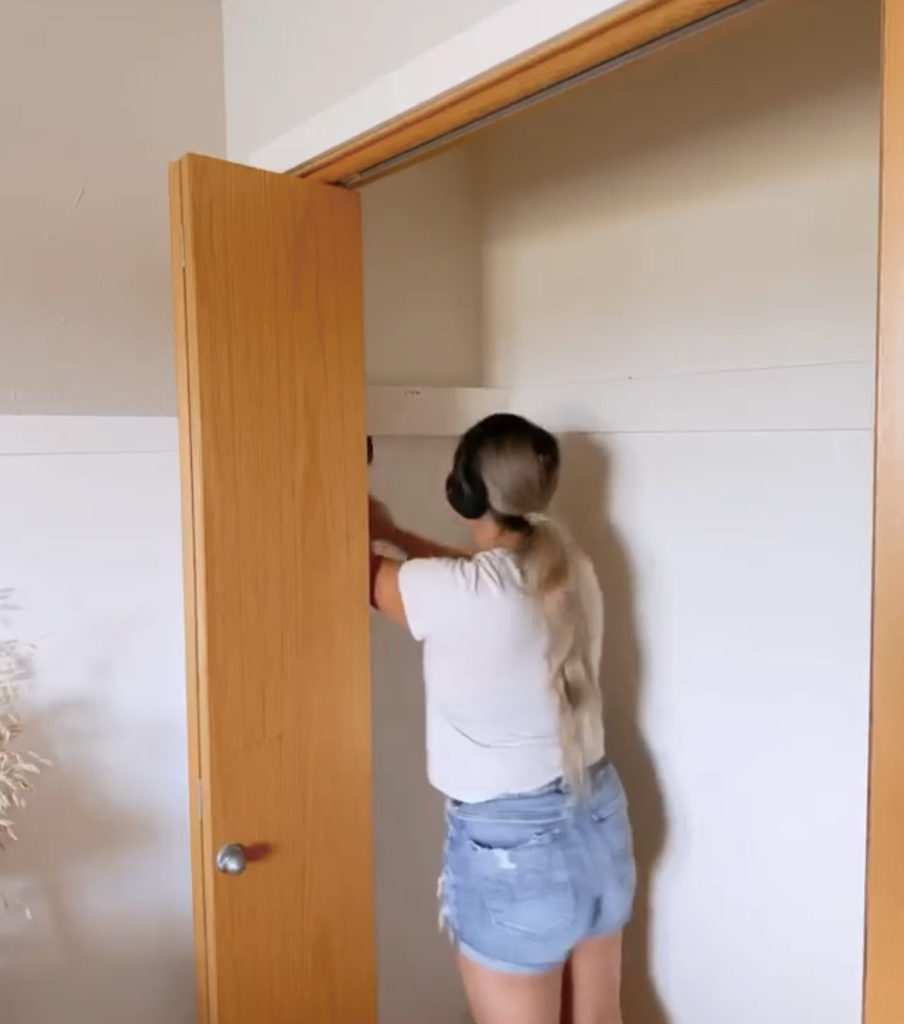
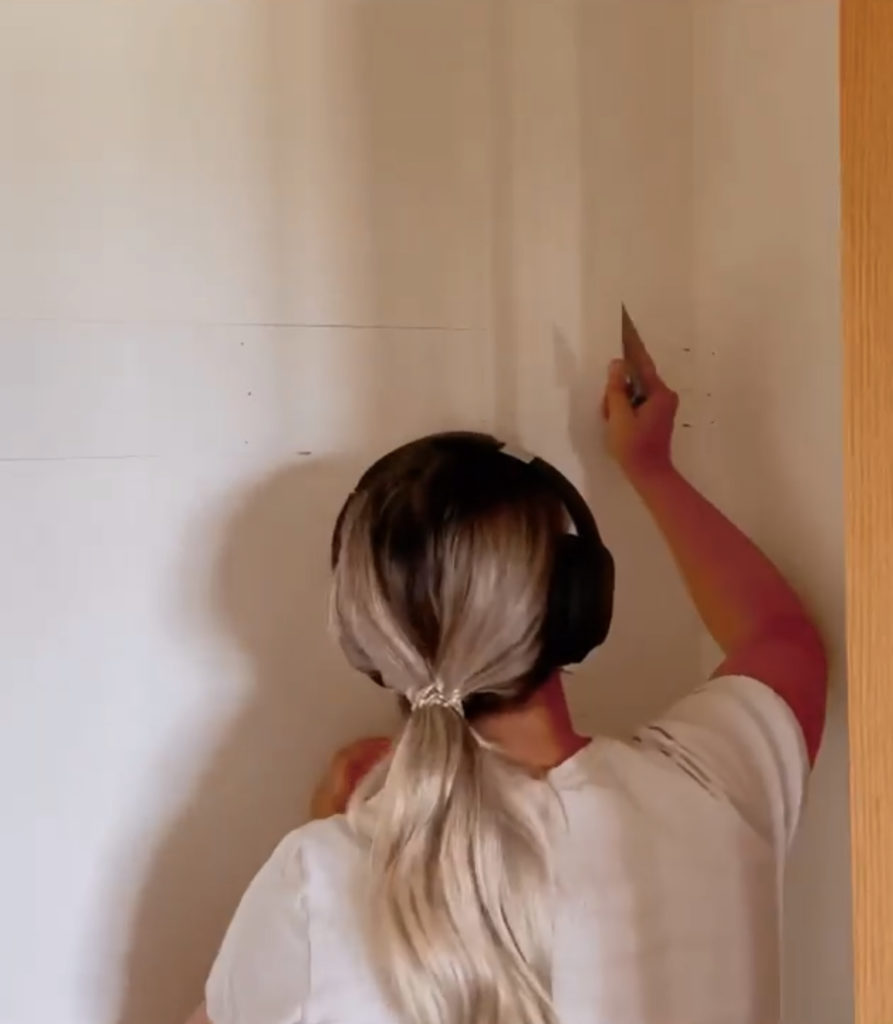
Step 2: Next, I spent time clearing out the existing cabinet and took out all the closet paraphernalia. In order to protect the drywall from excessive damage I used a pry bar and card board to remove the wooden shelf supports.
Step 3: Using the end of my putty knife, I spent time pushing any noticeable bumps lower than the drywall. I then used my favourite spackle from Dap Canada to help fill the holes so that they were flush with the drywall. DryDex spackle has a handy time indictor which gives you the confidence when you can begin to sand. The spackle goes on pink and you know it’s dry when it changed to white, this is a must have if you are new to DIY projects!
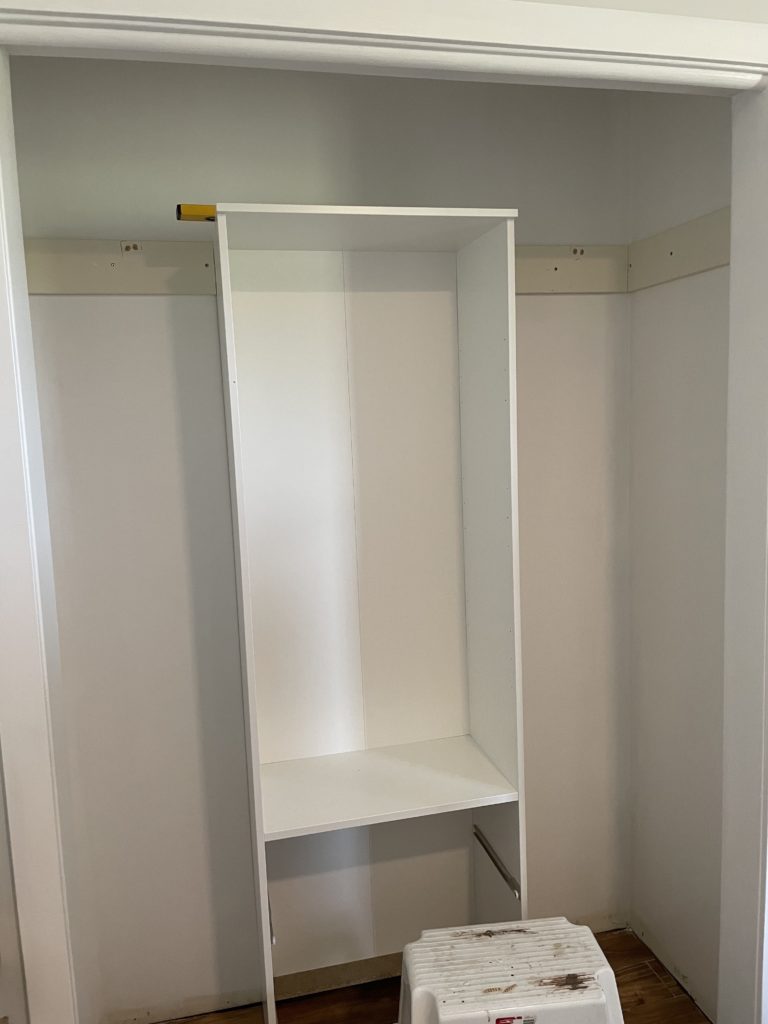
Step 4: While the DryDex was curing, I shifted gears and began to assemble the middle IKEA cabinet. IKEA products can have a bit of a learning curve at first, so give yourself some time. With a full IKEA kitchen reno under my belt, I’m a pro at building these babies, and with time you’ll be too!

Step 5: This may be the least enjoyable step, but let me tell you it will hands down be the most rewarding. Taking the extra bit of time to sand and paint the interior of the closet made a huge difference in how bright and fresh the closet felt.
Step 6: Once the paint was dry, I asked my hubby to help move the cabinet into place. When the cabinet was centered, I used L brackets to help secure the cabinet to both the floor and sides. I used longer screws (1-2″) on the floor and 3/8” screws on the sides so the screws didn’t go through the shelf.

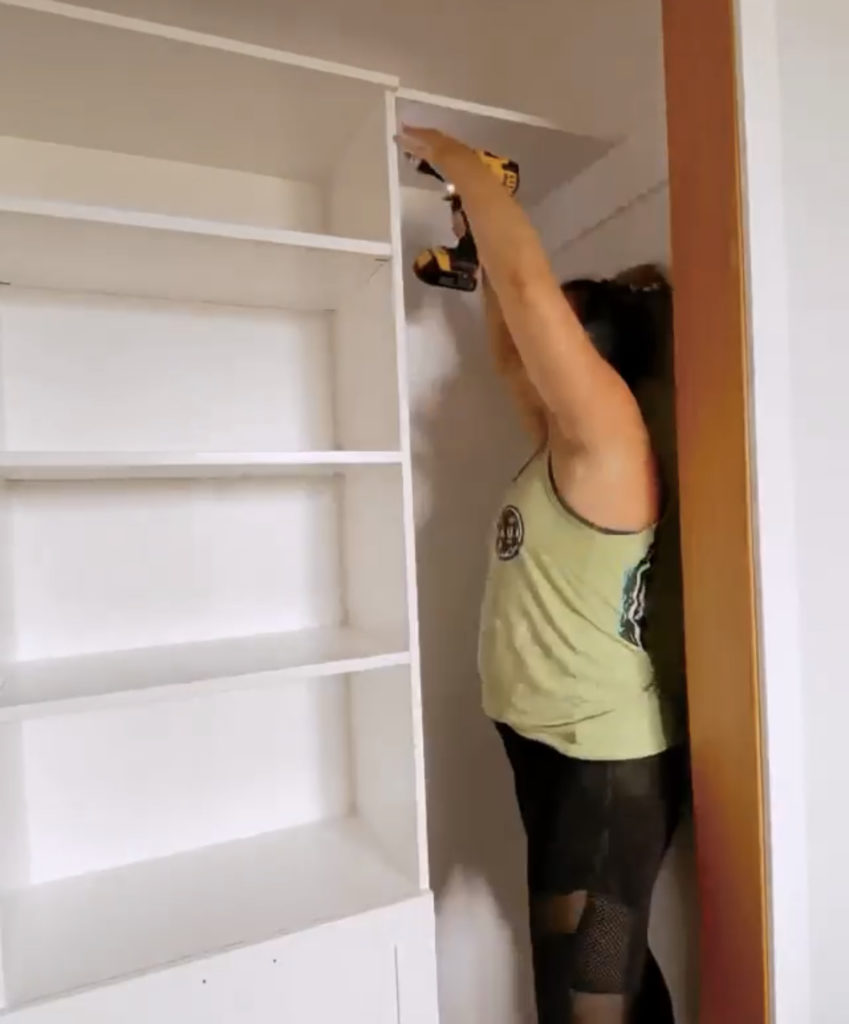
Step 7: Using the recycled shelf supports (they’re called jamb if you need to purchase) I added the supports to the back and sides of the closet. Using a level, I made sure they were the same height as the vertical IKEA cabinet. Then I located the stud in the wall using a stud finder, and began attaching the shelf supports using my air nailer and long nails. After the shelf supports were nailed in place, I then rested the existing closet shelf on top of both the supports and vertical IKEA cabinet. Always keeping safety in mind, I secured the existing closet shelf to the new IKEA shelf to make sure it didn’t move.

Step 8: Next I used akrylic caulking to fill in the seams. This step took my project from DIY to custom in a matter of minutes, and I’m positive it will do the same for your project. Watch this video if you are new to caulking and/ or find it intimidating, baby wipes will be your new best friend!
Step 9: Following the caulking, I put a couple coats of paint on the side and back shelf supports to help freshen them up and to match the painted walls.
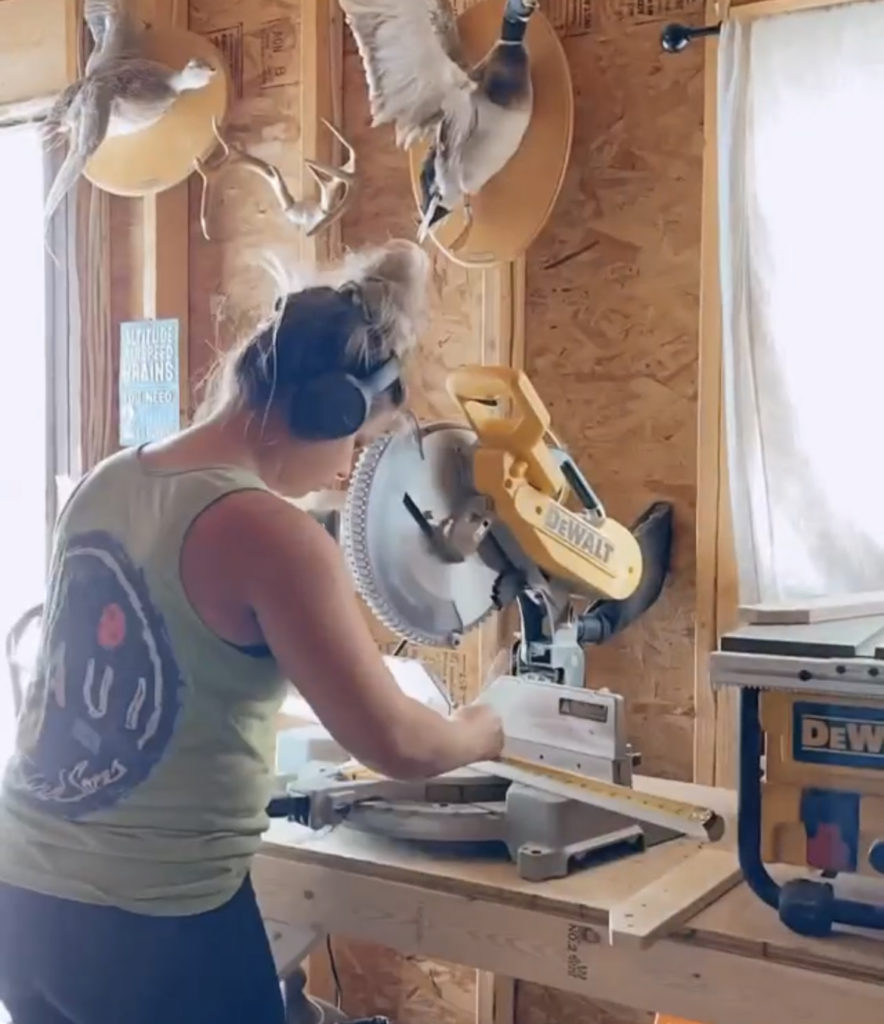
Step 10: With budget in mind, I used a 1” dowel for the rods (they were cheaper!) which also helped to bring in a scandi vibe. Before installing the dowels, I measured equal distances from the back of the closet (I did mine at 11 1/4 “out from the wall) and screwed in plastic rod holders. When deciding on depth, I made sure they were far enough out that a hanger could fit. I found that pre-drilling the plastic rod holder was key to getting the screw started. When drilling on the wall side I hit a stud, but if you don’t hit one you can just use a drywall anchor. On the shelf side I just screwed directly into the shelf. Using my mitre saw, I cut the dowel down to the size I needed, and then popped it in. You will need to repeat this step for each rod you want to install.
There you have it! An easy, budget friendly project you can accomplish on a weekend.
You can check out the process in video format on my Instagram page under the Highlight “closet built in”.
Any questions about the project? Comment below.
")

")
")

Love it! Did you put doors back on, or?
Yes! The finished photo is just styled and easier to photograph without the doors 🙂
Hi Kate! I Hope you are enjoying you Van trip with your family.
I am currently finishing up this same project for my newborn babies room. I was inspired by your page. I love the look with those baskets on the shelves. I’ve been looking everywhere like crazy for some that fit.
Where did you purchase yours?
Thanks in advance
What color are your walls? Love how it looks so fresh.
Curious on the dimensions of the closet? I want to do this for my daughter but think the shelf unit may be too big.